How to Make a Chanhua Lily of the Valley Brooch
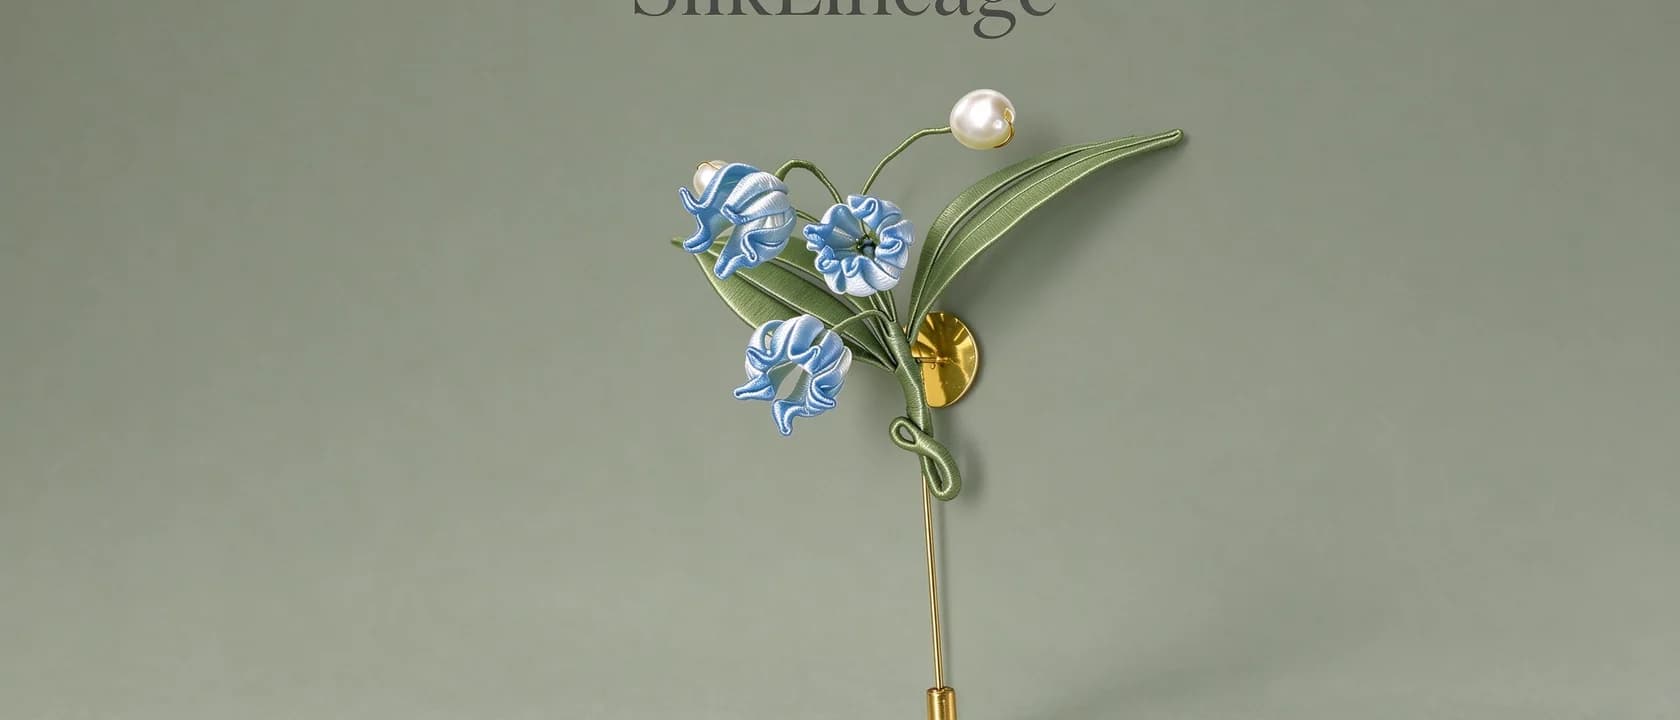
How do you make a chanhua lily of the valley brooch?
A chanhua lily of the valley is a curved stem carrying seven to ten small bell-shaped florets, graded so the lowest bells are the largest. Wound silk over wire, it finishes at about 8.5 cm and takes three to four hours — shorter than a round bloom, because each unit is small.
It is the same wrapping technique as every other chanhua piece; how to wrap silk thread around a wire frame covers that motion if you have not tried it yet.
Why is this flower built differently from a peony?
Most silk flowers are radial — petals arranged around a centre. A lily of the valley is linear, and that changes the whole build:
| Peony or hydrangea | Lily of the valley | |
|---|---|---|
| Structure | Round bloom | Curved stem with hanging bells |
| Number of units | 6–18, all similar | 7–10, graded in size |
| Hardest part | Keeping the bloom's silhouette even | Keeping the bells hanging on one side |
| Wears as | Hairpin | Brooch |
| Time | 4–6 hours | 3–4 hours |
The stems are what make it a brooch. Nothing about the flower is symmetrical, so it sits on a lapel the way a real sprig would.
What do you need?
| Item | Note |
|---|---|
| Bell-shaped wire floret frames | Curved frames, not flat petals |
| Dyed mulberry silk floss | One colour is traditional; a paler gradient at the tip is optional |
| Stem wire | Heavier than petal wire, because it carries the whole piece |
| Brooch pin back | Roughly 6 cm, or a hair comb if you would rather wear it in your hair |
| Pearl stamens | One small bead inside each bell |
| Glue, scissors, tweezers, lighter | As with every chanhua build |
Step 1: Grade the frames before you wind anything
Lay the bell frames in order from largest to smallest. Seven to ten is right for a brooch; more than ten and the stem gets crowded and loses the airy look the flower is known for.
Decide now which colour goes where. If you are using a gradient, the bells nearest the tip should be palest, and the two lowest the deepest.
Step 2: Wind the bells from the bottom up
Work in order of size, starting with the largest bell at the base. Wrapping a bell is slightly harder than wrapping a flat petal because the frame curves away from your fingers — turn the frame rather than your wrist, and keep the strand flat against the wire.
Each bell takes a few minutes once you find the angle. Expect twenty minutes for the first one and five for the last.
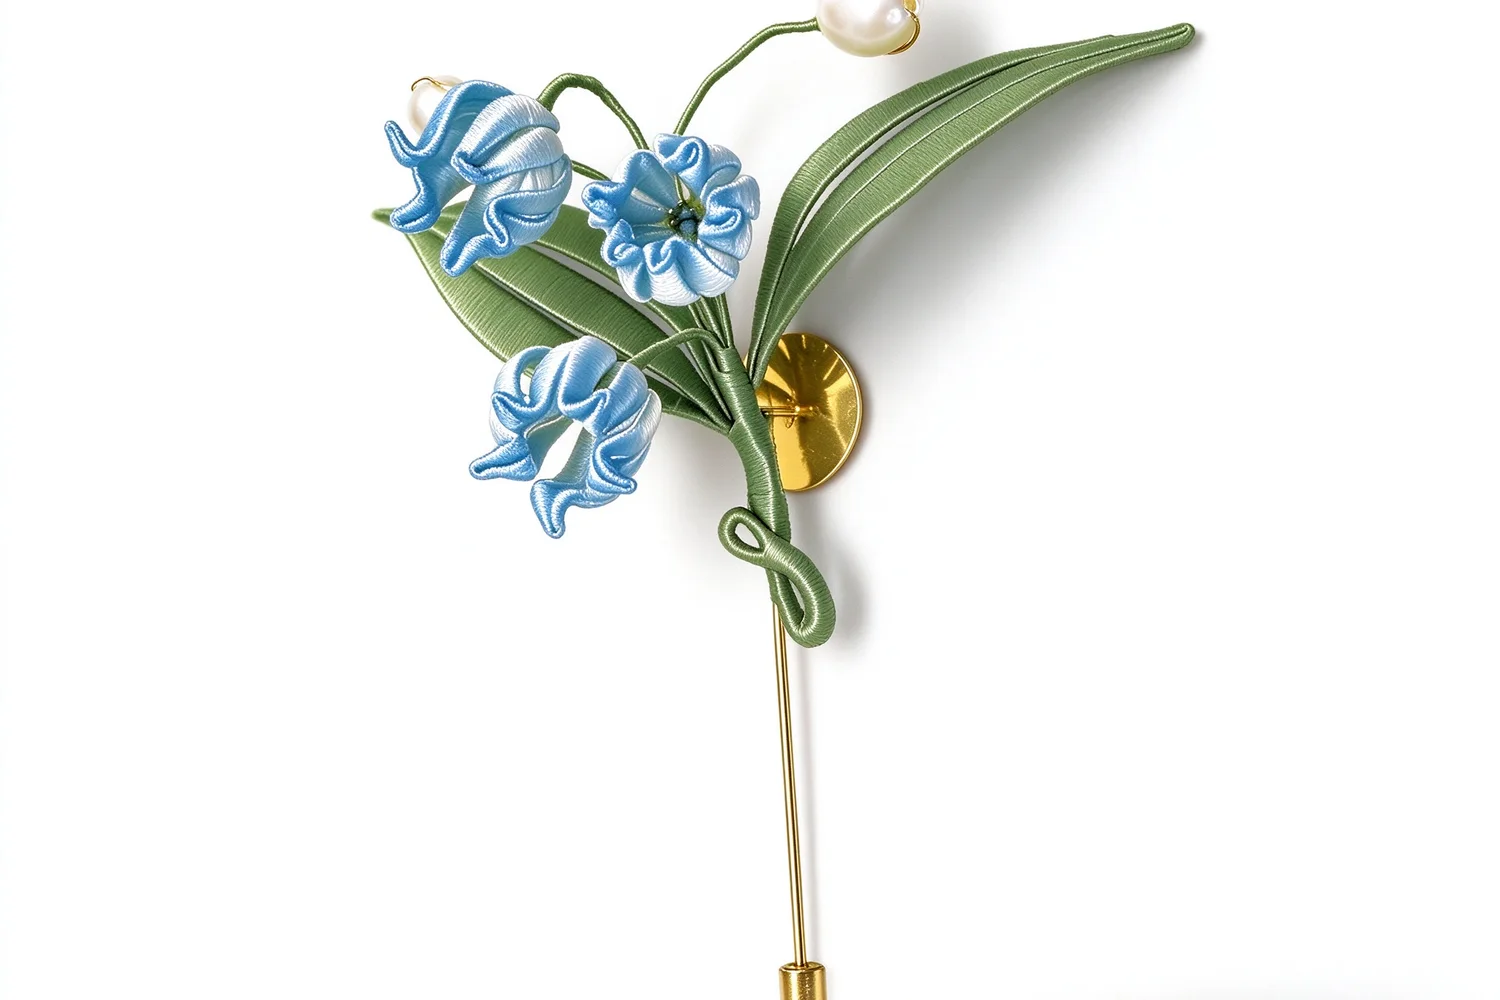
Step 3: Attach the bells so they all hang the same way
This is the step that decides whether the piece looks like a flower or like a bunch of beads.
- Curve the stem wire into a gentle arch first — the shape is easier to build onto than to bend afterwards.
- Attach the largest bell lowest, on the underside of the arch.
- Continue up the stem, always on the same side, with each bell slightly smaller than the last.
- Space them so the bells nearly touch but do not overlap — around 6–8 mm apart at this size.
- Leave the top 1.5 cm of stem bare. The bare tip is what makes the piece read as growing.
Wire each bell on with two tight turns, then seal the thread end with a flame before moving to the next.
Step 4: Set the centres and finish the stem
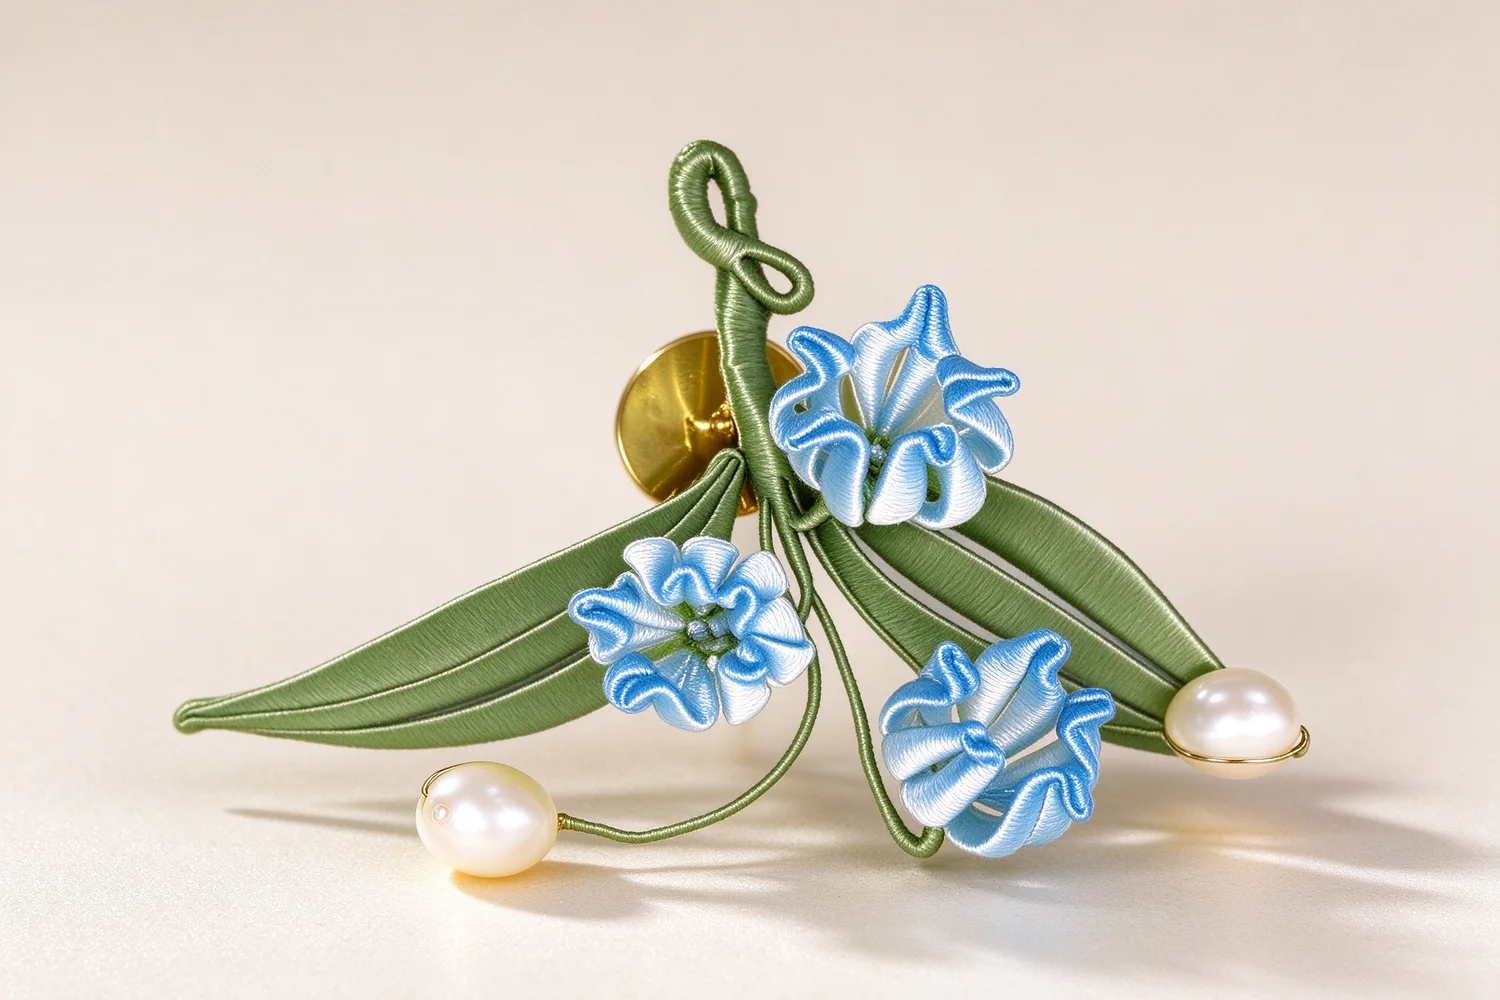
Glue one small pearl bead inside each bell. Because the bells hang downward, these centres are visible from below and from the side, which is where most people will see the piece when you are wearing it.
Then wrap the visible part of the stem in the same silk as the bells, so no bare wire shows at the joins. Leave the last centimetre bare and curl it slightly.
Step 5: Mount it on the pin back
Bind the stem to the pin back with three or four tight turns, then hide the binding under a short wrap of silk.
Let the glue cure for a full day before wearing it. On a brooch this matters more than on a hairpin, because the pin back takes the whole weight whenever you put the piece on or take it off.
How long does it take?
| Stage | Time |
|---|---|
| Grading frames and planning colour | 10 min |
| Winding 7–10 bells | 1.5–2 h |
| Shaping the stem and attaching bells | 45 min |
| Bead centres and stem wrap | 20 min |
| Mounting on the pin back | 15 min |
| Glue curing | 24 h |
Three to four hours for a first attempt, and around two and a half once you know the bell angle.
Where do you wear it?
A brooch is the most flexible piece in this craft because it needs no hairstyle at all. The rule is simple: solid colour, some texture, pin it where a real sprig would fall.
| Where | Works because |
|---|---|
| Jacket lapel | The classic position; reads formal and intentional |
| Coat collar | Adds interest without competing with a scarf |
| Knit sweater shoulder | The curve follows the shoulder line |
| Plain dress strap | Turns a simple dress into an occasion piece |
| Bag handle or ribbon | Worn without touching your clothes at all |
Smooth synthetic fabrics are the one thing to avoid — a brooch pin needs something with a little grip, and heavy cotton, linen and wool all hold it better.
The Lily of the Valley Brooch Kit contains everything listed above. If you would rather make something with more structure, the Blue Phoenix Brooch Kit is the same craft in a larger, more sculptural form, and the flower symbolism guide explains what each bloom means if you are making this as a gift.
Frequently asked questions
How big is a chanhua lily of the valley brooch?
About 8.5 cm from the top of the stem to the last bell. That is large enough to read clearly on a lapel and small enough to sit on a collar without pulling the fabric.
Why do the little bells need a curved stem?
Lily of the valley grows on an arching stem, and the florets hang from one side. Straightening the stem flattens the silhouette and the piece stops looking like the flower.
How many florets does it need?
Seven to ten bells for a brooch this size. The trick is grading them: the two lowest are the largest, and each pair above is slightly smaller, which is what makes the stem read as growing rather than assembled.
Can I wear it in my hair instead?
You can, and a curved stem looks good tucked along a low bun. But a brooch pin is not a hairpin — it needs fabric to grip. If you want it in your hair, mount it on a comb or a two-prong fork instead.
What should I pin it to?
A jacket lapel, a coat collar, a knit sweater shoulder, or the strap of a plain dress. It reads best against a solid colour with some texture: wool, linen or heavy cotton rather than smooth synthetic fabric.